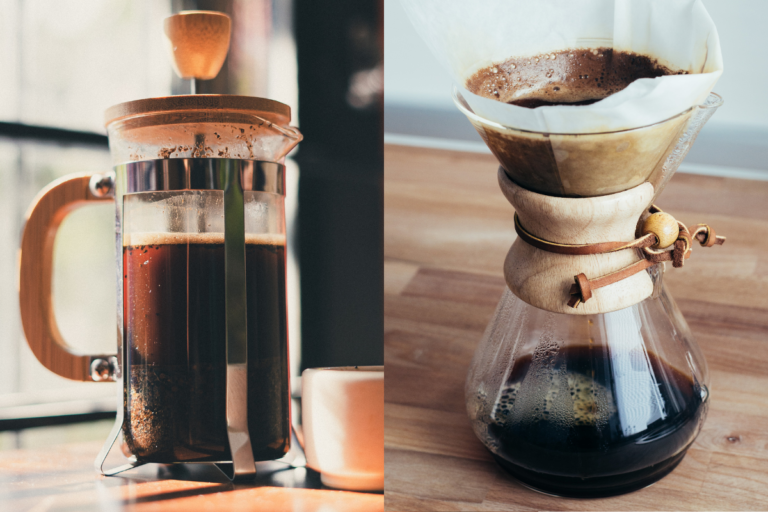
Beginner’s Guide to Creating Stunning Latte Art Designs
Latte art, the artful technique of pouring steamed milk into espresso, has transformed the humble coffee cup into a showcase of skill and artistic expression. It’s not just about the taste anymore; it’s about the presentation, the swirls, and the patterns that dance on the surface of your coffee.
Explore the creative aspect of enjoying coffee with a step-by-step guide to get started with latte art. Learn the essentials of espresso preparation, milk frothing, and artful pouring techniques to create stunning latte designs, perfect for both beginners and advanced baristas.
In recent years, latte art has become more than just a skill for baristas – it’s a trend that has captivated coffee lovers across the globe. From cozy corner cafes to buzzing metropolitan coffee houses, the visual appeal of beautifully crafted coffee is everywhere. Instagram and Pinterest are awash with images of perfectly poured hearts, intricate rosettas, and even detailed portraits, all created with nothing but milk and espresso.
Latte Art Explained: The Fusion of Coffee and Creativity

Latte art is the skillful practice of creating designs or patterns on the surface of a latte, a popular espresso-based beverage. It’s a blend of two key components: espresso and steamed milk. The contrast between the dark, rich espresso, and the creamy, white milk allows baristas to draw various designs, from simple shapes to complex images.
At its core, latte art is about precision and balance. The espresso must have a good layer of crema, which acts as the canvas for your milk art. The crema’s golden layer is essential for the milk designs to stand out. On the other hand, the milk must be steamed to a ‘microfoam’ consistency – where the milk is not just frothy but has tiny, uniform bubbles that create a smooth, silky texture. This microfoam is what allows the milk to flow and blend seamlessly with the espresso, creating those mesmerizing patterns.
Latte art isn’t just a display of technical skill; it’s an expression of creativity and a sign of quality. Well-crafted latte art implies that the drink has been made with care and attention to detail. The temperature and texture of the milk, the quality of the espresso, and the pouring technique all contribute to the final art piece. Each cup is unique, telling its own story through swirls and shapes.
In recent times, latte art has evolved into a competitive field, with baristas worldwide showcasing their talent in competitions. But beyond the competition, latte art has a more charming side to it. It enhances the coffee-drinking experience, making each cup a moment of delight. Whether it’s a simple heart or an intricate animal design, latte art adds a personal touch that turns your coffee into something special.
The Must-Have Tools for Aspiring Latte Artists
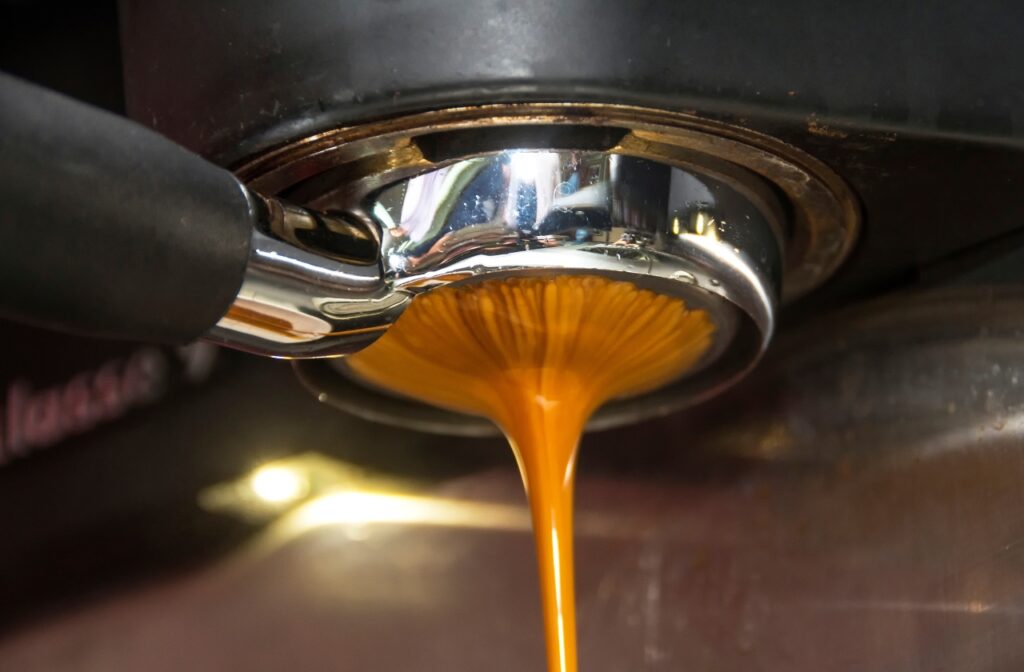
As you gather these tools, remember that the best latte art comes from practice and passion, not just the equipment. Each tool plays its part in helping you craft that stunning cup of coffee. So, get these essentials, roll up your sleeves, and let’s turn that latte into a masterpiece!
1. An Espresso Machine with a Steaming Wand
- Purpose: To brew a rich espresso and steam the milk to create microfoam.
- Key Feature: Look for an espresso machine with a good quality steaming wand, which is crucial for getting that silky, smooth milk texture.
- Pro Tip: While automatic machines are convenient, a semi-automatic or manual machine gives you more control over the shot quality.
2. Metal Milk Pitcher
- Purpose: For steaming and frothing milk.
- Preferred Material: Stainless steel for its heat conductivity and durability.
- Size Matters: A 12-20 oz pitcher is ideal for beginners. Larger pitchers are for more volume but can be tricky to handle.
| Pitcher Size | Best For |
| 12 oz | Single servings, more control |
| 20 oz | Multiple servings or larger cups |
3. Fresh Whole Milk
- Why Whole Milk: It has the right balance of fat and proteins to create stable, smooth microfoam.
- Alternative Options: Oat milk or barista-specific almond milk can be great dairy-free alternatives, but they might behave differently.
4. Quality Espresso Beans
- Purpose: The foundation of any good latte art.
- Bean Type: Freshly roasted beans are preferred; medium to dark roast brings out a rich crema.
- Grind Consistency: Essential for a balanced espresso shot. Too coarse or too fine can affect the crema.
5. Tamper
- Purpose: To evenly press the coffee grounds in the portafilter.
- Ideal Tamper Size: It should fit your machine’s portafilter snugly – usually around 58mm for standard machines.
6. Thermometer (Optional but Helpful)
- Purpose: To measure milk temperature while steaming.
- Ideal Temperature Range: Between 140°F to 155°F for perfect microfoam.
7. Latte Art Pen or Toothpick (For Advanced Art)
- Purpose: To add details or correct minor imperfections in your art.
- Use: A latte art pen can be used to draw fine lines or create more intricate designs.
Weird Coffee Tip: The accuracy and consistency of your coffee grind is crucial for brewing a top-notch espresso. A high quality grinder such as the CafeSing Orca will help you get repeatable consistend grids for home brewing.
CafeSing Orca Hand Grinder: A Convergence of Craftsmanship and Coffee Mastery
Mastering Espresso: The Foundation of Stunning Latte Art

Creating latte art starts with a solid foundation: a well-prepared espresso. Here’s a straightforward guide to getting your espresso right:
1. Choosing the Right Beans
Opt for fresh, high-quality espresso beans. The fresher the beans, the better the crema. A medium to dark roast is typically preferred for its rich flavor and excellent crema production.
2. Grinding the Beans
The grind size should be fine but not powdery. Consistency is key to ensure even extraction. If the grind is too coarse, your espresso will be weak; too fine, and it might be over-extracted and bitter.
3. Dosing and Tamping
Dose about 18-20 grams of ground coffee for a double shot. Consistency in dosing is crucial. Tamp the grounds evenly with firm pressure to avoid channeling (where water passes through the grounds unevenly).
4. Pulling the Shot
The ideal espresso shot should take about 25-30 seconds to pull. Look for a rich, caramel-colored crema on top, which is essential for latte art.
5. Machine and Portafilter Maintenance
Ensure your espresso machine and portafilter are clean and heated. A cold portafilter can affect shot quality, so running a blank shot through it to heat it up is a good practice.
6. Water Temperature
The water for your espresso should be at a temperature of about 195°F to 205°F (90.5°C to 96.1°C). Too hot and you risk burning the coffee; too cold and you won’t extract the full flavor.
Remember, making a good espresso is a skill that requires practice. Don’t be discouraged if your first few attempts aren’t perfect. Each shot you pull will bring you closer to the ideal balance of flavor and texture needed for great latte art.
Perfecting Milk Foam: Key Techniques for Latte Art Success
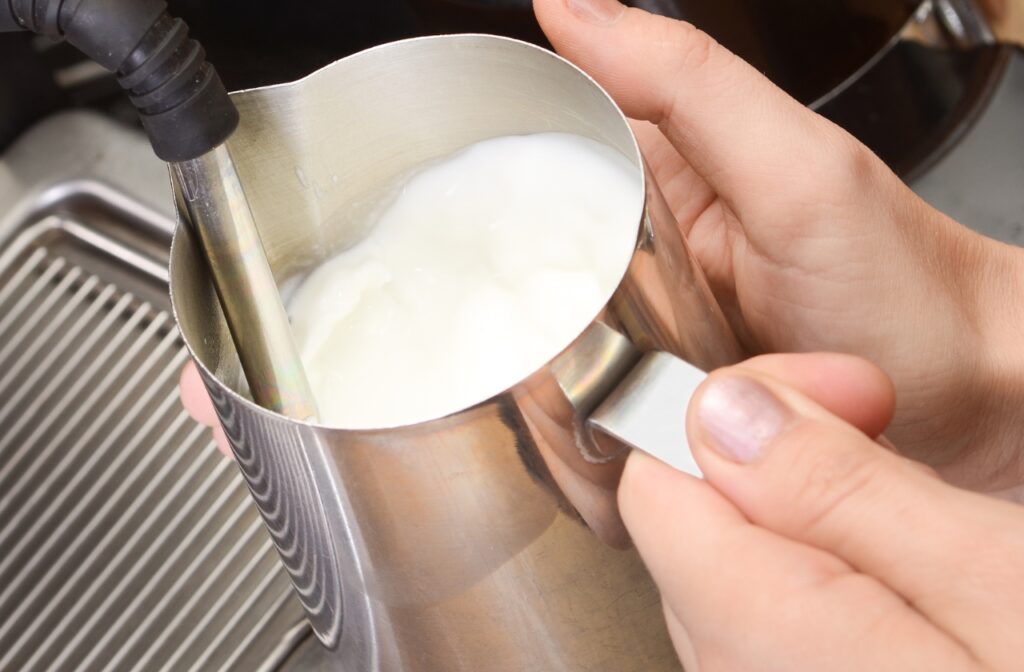
Milk steaming and frothing are crucial steps in creating latte art. The texture and temperature of your milk determine the quality of your art. Here’s how to master this skill:
- Choosing the Right Milk: Whole milk is generally preferred for its balance of fat and proteins, which creates a creamy, stable foam. For non-dairy alternatives, barista-specific almond or oat milk is recommended as they are formulated to froth similarly to cow’s milk.
- Temperature Control: The ideal temperature for steamed milk is between 140°F and 155°F (60°C and 68.3°C). Overheating the milk can ruin its taste and texture. Use a thermometer to monitor the temperature, or learn to judge by feel (the pitcher should be hot to the touch but not so hot that you can’t hold it).
- Frothing Technique: Fill your milk pitcher to just below halfway. Too much milk can lead to spillage or poor frothing. Submerge the steam wand’s tip just below the milk’s surface. This position introduces air into the milk, creating foam. Lower the pitcher as the milk expands and heats to keep the steam wand tip just below the surface. This helps create the ‘microfoam’ needed for latte art. Aim to create a whirlpool effect in the pitcher; this helps break down larger bubbles and creates a smooth, glossy microfoam.
- Achieving Microfoam: Tiny, uniform bubbles and a glossy texture, similar to wet paint, characterize Microfoam. The right microfoam is crucial for latte art as it pours smoothly and integrates well with the espresso.
- Post-Steaming Care: Once steamed, tap the pitcher on the counter to break any large bubbles and swirl the milk to maintain its silky texture. Use the steamed milk immediately for the best results. Letting it sit can cause the foam to separate from the milk.
- Practice: Steaming milk to perfection takes practice. Pay attention to the sound the milk makes while steaming – it should be a steady, hissing noise. Experiment with different types of milk and quantities to understand how each behaves under steam.
The goal of steaming and frothing milk for latte art isn’t just about creating foam; it’s about achieving a smooth, velvety texture that can be poured into detailed designs. Be patient with yourself as you practice – mastery comes with time and experience.
The Art of Pouring: Techniques to Elevate Your Latte Art
Pouring is the final and perhaps the most critical step in creating latte art. This stage is where your espresso extraction and milk steaming practice culminates into art. Let’s break down the key techniques:
- Starting the Pour:
- Begin by pouring steamed milk into the center of the espresso from a moderate height. This initial pour mixes the milk with the espresso.
- Keep the stream of milk steady and relatively thin. A jerky or too thick a stream can disrupt the espresso’s crema, making it harder to create patterns.
- Creating the Base:
- Once the cup is about half full, bring the pitcher closer to the surface. This is when the milk starts sitting on top of the espresso rather than mixing in.
- Tilt the cup slightly, if needed, to help control where the milk lands.
- Design Formation:
- For basic designs like a heart or tulip, start pouring slower and move the pitcher back and forth slightly.
- Wiggle the pitcher more rapidly while moving it back towards you to create a rosetta or more intricate patterns.
- The Finish:
- Finish your design with a final flourish, often called the ‘strike-through.’ This involves quickly dragging a thin stream of milk through the center of your design to create definition and contrast.
- Practice the speed and movement of your pour, as this can drastically change the look of your art.
- Control and Precision:
- The key to great latte art is control over your pour. Your pitcher’s flow rate, height, and angle all affect how your design forms.
- Practice pouring with different speeds and movements to understand how each affects the milk’s integration with the espresso.
- Common Patterns:
- Start with simple patterns like a heart or a dot (also known as a monk’s head). As you gain confidence, move on to more complex designs like leaves, rosettas, or swans.
Pouring latte art is an art form that requires patience and practice. Don’t be discouraged by early attempts – even the most experienced baristas took time to perfect their technique. Experiment with different styles, and most importantly, have fun with it. Each cup is an opportunity to improve and express your creativity.
Easy Latte Art Designs for Beginners: A Step-by-Step Guide
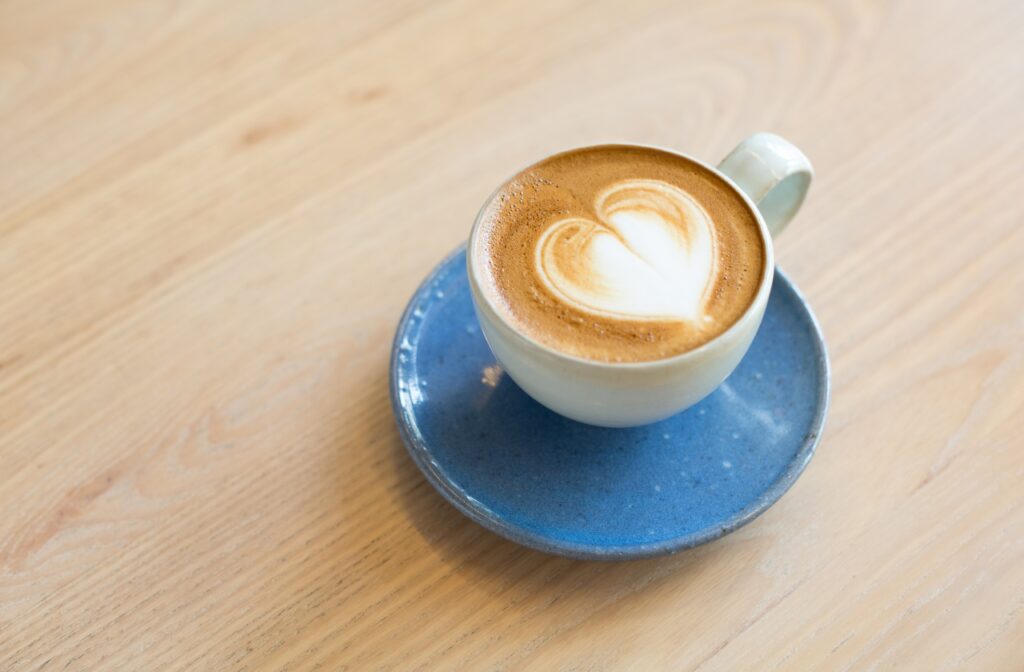
perfect for beginners. These designs lay the foundation for more complex patterns and help you master the basics of milk pouring and pattern creation.
- The Heart
- How to Create: Begin with the basic pouring technique, filling your cup until it’s about half full. Then, bring the pitcher close to the coffee’s surface and pour a steady stream of milk in the center. As the cup fills, shake the pitcher back and forth very slightly to create a rounded shape. To finish, push the milk stream through the center of the rounded shape to form the heart’s point.
- Tip: The key is in the final ‘strike-through’ motion – it should be quick and smooth.
- The Monk’s Head (Dot)
- How to Create: This is one of the simplest forms of latte art and a good starting point. Pour steamed milk from a height into the center of your espresso, allowing it to mix. As the cup gets about three-quarters full, bring the pitcher closer and slow the pour to let the milk form a white dot on the surface.
- Tip: Control the flow of milk to prevent the dot from becoming too large.
- The Tulip
- How to Create: The tulip is a progression from the heart. Start as if you are creating a heart, but instead of drawing through in one motion, stop pouring before the strike-through. Then, move the pitcher back slightly and pour another petal on top of the first. Repeat as needed and finish with a strike-through.
- Tip: Patience and control over the milk flow are crucial for clearly defined petals.
- The Rosetta
- How to Create: This pattern is slightly more advanced but achievable with practice. Start with a wiggle motion close to the cup’s surface, moving the pitcher back and forth as you move it backward. The milk flow creates a folded pattern, resembling a leaf or fern.
- Tip: Consistent speed and motion are important. Practice the wiggling motion to get even leaves.
These designs are the building blocks of latte art. Each requires practice and patience, so don’t be discouraged by initial attempts. Over time, you’ll develop a feel for milk flow and movement, allowing you to experiment with more intricate designs. Remember, every barista starts somewhere, and the journey itself is incredibly rewarding. Keep practicing, and enjoy the process of learning and creating!
Advanced Latte Art: Taking Your Coffee Creations to the Next Level

You might want to explore more advanced techniques as you become more comfortable with basic latte art designs. These methods require more control and precision but can lead to stunning and intricate art.
- Layering Techniques
- How to Execute: Advanced designs often involve layering different elements. This can be achieved by pouring multiple shapes on top of each other, like in complex tulip designs.
- Tip: Focus on the spacing and size of each element. Practice pouring smaller, more controlled shapes for detailed layering.
- Etching
- How to Execute: Etching involves using a tool (like a latte art pen or a toothpick) to create designs on the milk foam. After pouring a base (like a monk’s head), use the tool to draw or enhance designs.
- Design Ideas: Etched designs range from simple lines to elaborate drawings, like animals or intricate flowers.
- Tip: Work quickly as the foam will settle. Have a clear design in mind before you start.
- Free Pouring Complex Patterns
- How to Execute: This involves creating more complex shapes, like swans or dragons, with just the pour. It requires a very steady hand and a deep understanding of how milk flows and interacts with espresso.
- Tip: Start with the basic structure of the design and then add details. For example, with a swan, begin with the body and then add the neck and head.
- Color Infusion
- How to Execute: Introduce colored syrups or powders to your latte art. This can add an extra dimension to your designs.
- Tip: Use these sparingly and strategically for highlights or accents. Remember, the taste of the coffee is still paramount.
- 3D Latte Art
- How to Execute: This advanced technique involves sculpting the milk foam to create three-dimensional shapes atop the latte.
- Tip: The key is to achieve the right foam consistency – it must be thick and stable enough to hold its shape.
- Combining Techniques
- How to Execute: Use a combination of pouring, etching, and color infusion to create multi-faceted designs.
- Design Ideas: A common example is pouring a base design and then using etching to add fine details or text.
These advanced techniques are about experimenting and pushing the boundaries of what you can create with milk and espresso. They require a lot of practice and patience, but the results can be truly spectacular. As you progress, remember to maintain the quality of the coffee – the taste should always match the beauty of the art. Keep practicing, and don’t be afraid to try new and creative ideas!
Troubleshooting Latte Art: Common Mistakes and How to Fix Them

Even the most experienced baristas encounter challenges when creating latte art. Recognizing and correcting common mistakes is a crucial part of the learning process. Here are some frequent issues and tips on how to troubleshoot them:
- Inconsistent Milk Texture
- Mistake: The milk is either too thin (lacking foam) or too thick (too much foam).
- Solution: Ensure the steam wand is at the right depth when steaming milk. It should be just below the surface to create microfoam without large bubbles. Practice maintaining a consistent hand movement to achieve the desired texture.
- Espresso Shot Issues
- Mistake: The espresso lacks a good crema essential for latte art.
- Solution: Check your espresso machine settings and the freshness of your coffee beans. Make sure the grind size and tamping pressure are correct. A good crema often signifies a well-pulled shot.
- Design Doesn’t Hold Its Shape
- Mistake: The design spreads out or sinks into the cup.
- Solution: This usually happens if the milk is too hot or too frothy. Aim for the sweet spot in temperature (140°F – 155°F) and texture (velvety and smooth).
- Lack of Definition in the Art
- Mistake: The latte art appears blurry or lacks sharp lines.
- Solution: This can be due to pouring the milk too quickly or from too high. Pour steadily and close to the surface, especially when creating the design.
- Milk and Espresso Not Integrating Properly
- Mistake: The milk sits on top of the espresso or doesn’t mix well.
- Solution: Start pouring from a higher point and then bring the pitcher closer as the cup fills. Ensure the initial pour is strong enough to penetrate the crema.
- Trouble Creating Symmetrical Designs
- Mistake: Designs like hearts or rosettas come out uneven.
- Solution: Focus on the symmetry of your pour. Keep the pitcher at the center and maintain even side-to-side movements.
- Milk Flow Interrupted
- Mistake: Hesitation or shaking hands leads to a broken line in the art.
- Solution: Confidence is key. A smooth, continuous pour is essential. Practice pouring without interruption to develop a steady hand.
Troubleshooting in latte art is largely about practice and patience. Each mistake is a learning opportunity. Keep experimenting with different techniques and adjustments; over time, you’ll find the right balance and methods that work best for you.
Final Thoughts: Celebrating Your Coffee Creations
As we reach the end of this guide on creating stunning latte art designs, it’s important to reflect on what we’ve learned and what lies ahead. Latte art is more than just a skill; it adds beauty and personal touch to a beloved beverage. It speaks to the care, precision, and creativity of making a great cup of coffee.
Remember, the journey to becoming proficient in latte art is unique for everyone. It’s filled with trials and errors, but each mistake is a stepping stone towards improvement. The satisfaction of pouring a perfect heart, rosetta, or any design of your creation is unmatched and well worth the effort.
Keep practicing, stay patient, and, most importantly, enjoy the process. Whether you’re a home enthusiast or a professional barista, the creativity of latte art is a rewarding skill that brings joy to both the creator and the recipient of each cup. So grab your pitcher, fire up your espresso machine, and keep pouring. With each cup, you’re not just serving coffee; you’re creating art.
-
Espresso Express eBook
R180,00 -
From Bean To Brew eBook
R450,00 -
Great Coffee, Made Simple
R0,00
